Building a Common Navigator based viewer, Part IV: Object Contributions
Action may not always bring happiness, but there is no happiness without action.
-- Benjamin Disraeli
-- Benjamin Disraeli
Overview
In the last post, we discussed how to configure the popup menus for a Common Navigator instance. As we saw, a Common Navigator can declare all of its menu insertion points through the org.eclipse.ui.navigator.viewer extension point and indicate whether contributions to the org.eclipse.ui.popupMenus extension point should be honored. The declarative menu configuration serves the dual purpose of avoiding programmatic configuration of the menu structure, and documenting the menu structure for potential extenders.
We also briefly talked about the two ways that contributors can tap into a menu. The first was through org.eclipse.ui.popupMenus, which allows you to add menus throughout the workbench, and the second was through org.eclipse.ui.navigator.navigatorContent, which is specific to the Common Navigator framework. We will cover ...popupMenus in this article, and ...navigatorContent in the next.
As always, you can find the full source for this example in the org.eclipse.ui.navigator.examples plugin from the Eclipse CVS repository. There are also some instructions on using Eclipse with CVS, which also documents the repository paths.
With that out of the way, let's dive into the example.
Adding a Delete Property action through org.eclipse.ui.popupMenus
Recall that for this series of articles, we are rendering a simple model of a properties file.
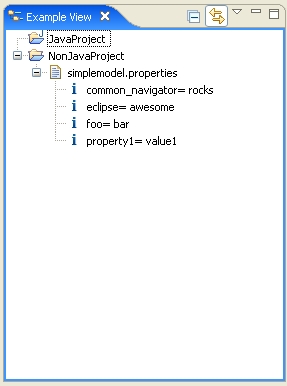
Now we are going to add a Delete Property action that allows a user to select a property from the listing above and remove it.

Open the Plug-in Manifest Editor by double clicking the plugin.xml file in your plugin project. If you're not quite sure what this means, check out Part I of this series.
On the Extensions tab, select Add... and choose org.eclipse.ui.popupMenus. If you don't see this option listed, uncheck "Show only extension points from the required plugins". If you haven't already added org.eclipse.ui as a dependent plugin, this will take care of that for you.
Now select the entry created in the list ("org.eclipse.ui.popupMenus"), right-click and choose "objectContribution". Then, right-click again and choose "action".

An objectContribution can declare menus (submenu extensions of the popup menu) and actions. The extension is fairly verbose to help optimize plugin loading. That is, the extension declares enough information that the actual class (and therefore the plugin) doesn't need to be loaded to render the menu. If the user never selects the action, then the plugin needn't be loaded.
In particular, the extension declares the menu label, the menu icon, and a tooltip among other things. The extension also declares the menubar path (recall we described the values for insertion points in Part III).
Use the values from the following diagram to configure the action element. You can enter the values on the Extensions page, or flip over to the plugin.xml tab and fill it in by hand.

There's a few things we should discuss here.
First is the objectClass, which declares that we are interested in ...PropertiesTreeData. Recall from Part II that we defined a simple object model to represent the name=value pairs in a property file. To delete these items, we want our action to enable on instances of our model.
The class attribute specifies a subclass of org.eclipse.ui.actions.ActionDelegate. The implementation of DeletePropertyAction.run(IAction) has some boilerplate for robustness, but the important part is as follows:
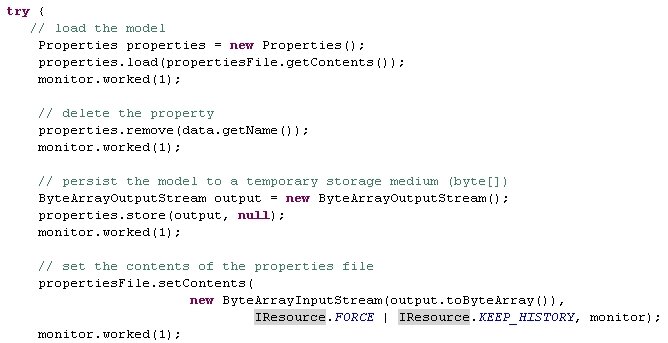
ActionDelegate declares a selectionChanged(IAction, ISelection) method that is updated when the selection in the viewer changes. We override this method to remember the selection, so that in the event that the user selects the menu option, we know what item they clicked on.
Summary
And that's all there is to it.
Now you should feel comfortable experimenting with adding more actions to the popup menu, as well as adding submenus. Be sure to check out the menu element (accessible in the same way you found action earlier). If you use the Extensions tab, all of the available attributes will be accessible to you, and remember you can use the right-click menu to create sub elements.
In this article we covered the basics of contributing an action to our example viewer through the org.eclipse.ui.popupMenus extension point. In the next article, we'll cover how to programmatically configure the menu using an extension of org.eclipse.ui.navigator.navigatorContent.
posted by Michael D. Elder at 7:30 PM
![]()
![]()


<< Home